/* Statutory Warning: Though I
will try my best to help, but I, or anyone else, is not
responsible for any damage that you willingly, or unwillingly, commit to
your device. */
// This
will also void any kind of warranty that Reliance MIGHT have given you
otherwise.
//
Also, I tend not to write, but if I do, it goes a bit lengthy. Kindly bear the
torture and read the entire stuff before proceeding with anything. My aim is
not to get over with it, but to make people understand what they are doing. I
do not wish to be cursed by anyone.
I know I
have kept everyone waiting, but finally got the time to write. Namashkaar!
The news is
that, I have managed to install a custom ROM on my Reliance 3G Tab a.k.a. ZTE
V9C, and hence rooted and unlocked it. Though its not complete, its running
well, and I'm able to do my day-to-day work, better than before.
Quadrant
score of 1172.
I'm writing
here a review-cum-guide for all interested (which I presume will be a
considerable % of the Indian tablet users :D ).
So about
the device: Awesome piece, more than a gadget. Since i ordered it three months
ago, I have sparingly used my laptop.
+ :
1.
Excellent display. Best in its class.
To all
those who crib about it being 800x480: Get a life! I have used many
android-based cellphones in the 10-15K range, most of them having the same or
higher resolution. But none fared as good as this. In a display, color
rendering and brightness matter more than its resolution.
The Tab
surpassed everyone's expectations: Awesome colors. Delight to work and play on.
Very smooth playback, even without rooting. Though not good as an iPhone, the
screen's clarity is comparable with a BlackBerry handset. Better than all
Nokias and 98% Samsungs.
Heck, the
display is as large as four 3.5" screens placed together with the cost of
one.
2.
Decent built and finish.
As soon as
you open the box, the presumption vanishes that its a cheap device. It is VERY
well crafted. People actually look at you when you take it out. Can easily hold
it with one hand. Made by the same company who manufactured the original Galaxy
7" Tabs, and in many places, a derivative of that only, its a level better
than its predecessor.
Its overall
design and shape is almost similar to the Samsung Tab. But the V9C manages to
get a better face value because of the narrower borders on the longer side of
the screen. Because of this very reason, it feels like an overgrown smartphone
rather than a small tablet. Also, light enough to carry around at ~400gms. The
iPad, on the other hand, is certainly not portable. V9C is. I slip it into my
jeans pocket most of the time.
Summary: My
first impression was, yaar, it's smart. A bigger 3GS. :->
3. Has
EveryThing. !?!
Come on,
almost everything which comes out in the markets nowadays, from a basic 1280 to
a Micra, lacks some or the other feature. Not this time.
ZTE has
managed to squeeze in every technology it could find. Its gift to Reliance has:
a. 7" screen, 800x480,
multi-touch capacitive. 160 ppi.
b. 3G/2G voice, data and SMS (works as a phone too).
c. In-built GPS.
d. Bluetooth.
e. Wi-Fi.
f. 3-axis Accelerometer.
g. Gravity sensor.
h. 3-axis Magnetic field sensor.
i. Orientation Sensor.
j. Ambient Light sensor.
k. Linear acceleration sensor.
l. Rotation Vector sensor.
m. 3.15 MP rear camera.
n. 640x480 (VGA) front camera.
o. Qualcomm MSM-7227-T processor (rated at 800MHz).
p. Qualcomm Adreno 200 GPU (YES, it has it!).
q. 512 MB RAM.
r. 3400 mAh battery, with 9hours of juice.
s. Dolby surround speakers.
t. MicroSD expansion upto 32GB.
Phew!!!...
4.
Marathon battery.
Even before
the root, I have watched three full-length movies, back-to-back on a single
charge, with appropriate brightness settings, airplane mode on and headphones. Seven
hours straight. Matters, considering the fact that display and
processor are the most power-hogging components.
With
average use, i.e. surfing the net, using the usual apps, music playback, and
couple of hours of gaming, it gives you more than the rated nine hours. Needs
to be charged only once a day. An overnight charge typically suffices for the
next eighteen hours. The situation is even better after the root.
5. Very
smooth video playback.
Its a
delight to watch movies on. Seven inches is also large enough for the purpose,
provided one holds it at a comfortable distance from the eye.
6. Enough
power under the hood for everyday use.
For those
who proceed to root, you will realize how much capability the processor has.
7.
Reliance GSM Connection.
Believe it
or not, I was getting satisfactory speeds for all purposes over RCOM's 2G
connection. Best part is, they offer 6 GBs of usage in 99/-,
which I guess is the highest in India. And the bandwidth I got in UPW used up
my entire quota.
Now, though
I love my Tab, it does (did, before the root) has a few -s, which I am going to
list here, since this is supposed to be an honest review:
-1. Its
delicate. Both the backpanel and the screen are scratch-prone if not taken care
of. But that can be solved by laminating it with guards, which I got done on
day one itself.
And then,
which beauty doesn't needs to be handled with care? ;-)
-2. Locked to Reliance. Eewww. That sounded bad. They say its a hardware lock? Wait and watch.
-3. Not enough powerful processor. Wait, it was supposed to be 800 MHz, right??
-4. Can not be rooted. (Slap! To the stupid firmware Reliance shipped it with).
-5. No video calling!!!
Why the hell did they install a front camera if its only purpose was to be a
mirror? None of the video chat apps (Skype, fring, etc.) recognize either of
the cameras.
-6. No graphics card. (Oh, shut up. Didn't he just say it had one? ).
-7. Plays only mp4 videos. Other AVI
players don't seem to work well either.
-8. Low internal memory.
That was a
not-so-brief intro.
Q. Why should we unlock?
A. You might want to use your old number(s) with
the Tab. Maybe use it as a spare phone too. You might not be happy with the
RGSM coverage in your area. Or, you want to use 3G, because of which you
purchased this Tab, but there's no 3G by Reliance in your circle / bad 3G by
Reliance / You simply don't want to pay them for anything.
I did it
because I have always used BSNL's 2G data plans for internet usage. It has the
same packs all over India, has the actual countrywide coverage, has the largest
3G network, doesn't charges you roaming, and allows you to use UMTS/HSDPA
signals even if you are a 2G subscriber.
Q. What
does that mean?
A.
Connection speed on your SIM is defined by the servers on the basis of tariff
you subscribe to. But, the passage that speed enjoys is different for 3G and 2G
signals. BSNL, doesn't restricts you from its 3G network simple because you
didn't cough up your entire pocket money to pay for a tariff. Even if you paid
98/- for a month, you can still switch your mobile/tablet/datacard's network
mode to UMTS and be on the more stable signals. Others (e.g. Airtel) won't even
register your SIM card on a UMTS network.
To put it
in layman terms, 2G is an Alto and 3G is a Honda City. BSNL allows you to use a
10-lane expressway even if you drive an Alto. You can be more free, avoid
collisions (disconnections), and throttle up to the full capability of your car
(use the theoretically possible maximum speed for EDGE, ~260 Kbps), without
having to pay more than five times the price and fuel cost.
Q. What is
a 'root' for an android device?
A. Android,
like many others, is based off a linux kernel. And Tux, is a shy lady. It
doesn't allows you to play with it beyond your permissions, to save itself from
accidental damage. IF you really need to do it, then you have to log in as a
'superuser', or su, so that you are able to make system-wide changes, and even
modify the core files. Once logged in as su, you are called to have 'root'
access, and hence, you can install any application or remove any stuff, even if
it directly affects the system files.
Same is
true here. I view android as another linux distro, like fedora or ubuntu. Which
it is. It is good,
yes. But it can be very, very dangerous, for those who don't know what they are
doing.
Q. Why
should we root?
A. To open
up your device. Customize it as per your will. Make it reach its maximum
capabilities. Install those variety of apps which can do interesting stuff.
Overclock.
The
Reliance 3G Tab needs a root foremost to remove the Skin and other
customizations, which REALLY slow the UI down. Not usually, but very often.
Reliance, apart from forcing their irritating skin, has kinda disabled the GPU,
and limited the processor to 620 Mhz. I have no freaking idea why they did so.
Maybe to enhance the battery thoroughput.
Also, I
wished to see, what all can it do for me. How many -ve can I null out. And I
was not disappointed.
Q. How do
we do it?
A. The
bitter truth: There is no real root for the stock 2.3.4, with which our Reliance
V9C is shipped. All the z4root's and SuperOneClick's don't work. The only way
to gain root is, install a custom ROM which is, in principle, pre-rooted.
General
procedure is: root an android -> install ClockWorkMod (CWM) -> backup
your stock -> install CyanogenMod (CM).
But, since
as I said, we can't root this tablet, the biggest problem we will face is we
won't be able to backup the shipped ROM. Hence, we lose all the drivers of our
device, and because neither RCOM nor ZTE are willing to release the ROM/update,
we will have to rely on experts to solve our issues for some more time to come.
Q. ROM?
CWM?? CM??? WTH????
A. Android
devices are abundant in nature. There are many species floating around. Each of
them has different hardware capabilities. So, a manufacturer needs to modify
the source android (crafted by Google), add/remove bits as per need, load
appropriate drivers and applications, and then create a new distro (version of
an operating system), which is specific to the device he is creating.
This OS, is
then packed, and loaded on every device's Read-Only Memory area. So, the OS,
alongwith the code required to boot it, the hardware-specific firmware, all
combine to form the ROM, as we generally call it, since it is a package of
everything that resides on the device's actual ROM.
Ever since
your age-old desktops, or PCs appeared, there are OSes. These OSes needs
something to load them, which is able to interact directly with the machine,
and tell it that this is where the OS lives, and this is how to get it running.
This code is called a bootloader. Even windows has it, problem is it isn't
accessible at all. Linux's GRUB, on the other hand, is a very powerful tool,
and can be customised to load anything on the planet. Even load/install/recover
something which doesn't exists on your system.
Every
android device comes with a manufacture-installed recovery tool, used in case
something wrong happens, and you wish to restore. CWM is a variety of the
recovery tool, which can do a LOT. It can install a new ROM, tweak the
bootloader to load it, make a backup of your device's exact state, restore from
a backup, etc. etc.
CWM needs
to be installed on the recovery area of the device. For this, you need root.
Once CWM is in place, you can install any ROM you wish, as long as it is
capable with the device. You can even backup your system's default ROM to
restore from it in case anything goes wrong, or you are simply not happy.
CyanogenMod
is a custom ROM, developed by an open community. Many people, including me, believe
that a CM ROM is always better than the stock ROM your manufacturer gave.
Reason is, it is managed and upgraded continuously by active developers. It
allows a lot of customizations which could never be expected from Google.
In our
case, we have no other option till date. We have to go with CM.
As with any
ROM, we need CWM to load CM.
We will, in
due course, be loading the latest, stable, CM7.1 (2.3.7) release for the ZTE
V9.
**This guy
missed out the 'C'. He said V9**
No, I
didn't. We will have to get the CM7 for V9. Simple reason for that is: Cyanogen
community has till now, not developed a specific ROM for our dear V9C.
V9C has
been given by ZTE to only two providers till date: India's Reliance and
Taiwan's TWM. So, maybe, someday, something is made for the V9C too. My friends
in the IITs, help!!!
The ZTE V9
is a tablet, much similar like ours. Its predecessor, to be precise. Looks the
same. But it has a resistive screen instead of a capacitive. 600 MHz processor.
No GPU. 2 MP rear camera. No front camera. It has been around for more than an
year now, and has been sold worldwide. That is why more people are developing
for it.
Now, the
procedure. It will work well if you have not done ANY attempts to root it till
now.
*!* WARNING:
Loading the
current CM7 might make your tab awesome, but WiFi, Bluetooth, Front Cam and the
Sensors will STOP working. I repeat, these four components will NOT work, till
we find fixes/solutions/drivers for them, which will be soon.
I am happy,
and even if someone offered me to go back to the stock ROM, I won't. Because
I'm loving the overclocking and BSNL HSDPA and louder volume from speakers and
faster UI and AVI videos and all those 'root required' apps. The front camera
was useless anyways. I don't use BT/WiFi at all. Can live without sensors.
Section I: Get rid of
the stock.
//This part
requires a desktop/laptop/netbook/whatever running Windows 7 preferably. I have
renounced XP years ago, so don't even exactly remember how it worked.
//A stable
internet connection is a must to download files. Any error while downloading
can corrupt the ROM and render your device useless.
2. Turn the
device off.
3. Press
and hold the VOL - button. Without releasing it, press and
hold the POWER button also. Do not release any of them for ~15 seconds.
4. This
will take you to the FTM mode. Big letters with white background will appear on
the screen.
5. Connect
the device to the computer with the USB cable that came along.
6. Open
Start menu, right-click on Computer, select Properties. Click on Device Manager
(top left).
7. Expand
the Ports (COM & LPT) section. You will see a ZTE Handset Diagnostic
Interface (DFU) entry. Note down the COM port number that appears in front of
it.
8. Open the
folder you extracted the downloaded file to. Start
Sales_MultiDL_MSM7227_patched.exe
9. Choose
Option -> Port Config and configure the COM on Line 1 -- DIAG to the port
number you noted down above. Click OK when finished.
10. If you
followed the steps correctly, at 1., you will see your device's name in the SW
box and a READY in green at the right. If not,
repeat steps 2-9.
11. Choose
"Backup NV" in 'Action Mode' and click "Start All". Wait.
Now a file called Channel1.nvm will be created in that directory, ~70 KB. Make
a copy of it somewhere else, e.g. your Documents folder.
12. Switch
action mode to "Download" and click on "SW Directory".
Choose the "files" folder, which is inside our extracted to
directory. Click OK.
13. Say 'Jai
Mata Di' and click "Start All".
14. After
3-4 minutes it should have finished flashing. Disconnect the USB cable and
remove the battery from your Tab.
15. Put the
battery back after ~10 seconds and power up the device normally, i.e. using
only the power button, as you usually do.
Be patient.
It will take some time to boot.
16.
Complete the V9 First Run Wizard. This will assure you that the touchscreen is
working.
This will
also install ClockWork recovery 4.0.1.4. Later on that.
You now
have your tablet working back again. At this stage, it is rooted and
unlocked. Congrats!!
The good
thing is, we have managed to increase the user data space (which you call
Internal Memory), to ~300 MB. You can verify the same from
Settings -> Storage.
Why should
you take further trouble? Because I realized that even my rear camera was not
working fine with this edition of CM7. All green display. You can check it for
yourself.
Also, feel free to put your favorite SIM card and boot the tablet. It
should be working.
Section II:
Updating CWM.
The above
procedure formatted EVERYthing on your device. Even the FTM mode. Now, if you
(try, not mandatory) do steps 2 and 3 above, you will see a menu instead,
showing ClockWork 4.0.1.4. Though you will be able to move around with the
volume buttons, you will not be able to select anything, since there is no
physical Home button. That is why, we need to update CWM with a V9-specific
version. Pull out and insert battery again, thereafter boot the tab in normal
mode to continue:
18. Rename
the extracted file from 'whatever'.img to recovery.img .
20. Connect
Tab to computer via USB cable. A few notifications will appear. Open the
notification area, select 'Copy files to/from Computer', and enable Mass
Storage mode (this was for those who didn't knew how to copy files to SD card
thru USB).
21. Your SD
card should appear in your Computer as a removable drive. Open it, and Copy
both the Recovery Manager APK and the recovery.img to your SD card. Not inside
any folder, just paste it in the open.
22. Turn
off USB Storage on your tab. Disconnect the cable.
23. Open
Settings -> Applications. Ensure the Unknown sources
checkbox at the top is ticked. Do it if it isn't.
24. Open
File Manager, and in the SD card, select the Recovery Manager APK. Select
'Install'.
25. In your
launcher menu now, you should be able to see Recovery Manager. Open it.
26. Select
'Recovery' at the top -> Install Recovery.
27. In a
few seconds, it should be able to show you the 'recovery.img' you copied to the
SD card. Select it. Accept the warning. The system should reboot after
sometime.
28. Repeat
steps 2 & 3. You should see CWM 4.0.1.5 installed, instructing you to use
the power button now instead of home.
Remove
battery, and boot normally.
Section III:
Installing CyanogenMod Stable.
30. Do step
20 above. Copy the downloaded file to your SD card. Do step 22.
31. Turn
off the tablet.
32. Repeat
steps 2 & 3.
33. Using
the volume buttons, select 'install zip from sdcard'. Press the power button to
click.
34. Press
power again to select 'choose zip from sdcard'.
35.
Navigate down and select the update-cm-7.1.0-V9-signed.zip file you just
copied.
36.
Navigate to the 'Yes - ' and press power. Wait.
37. After
it is completed, pull the battery and back. Boot normally.
What you
get now is what you will live with for some more time. Customize it as you
usually do. Feel free to explore and play around with the CM7 settings. Its a
very stable ROM. This should also give you the Android Market once you register
a Gmail account (notify me if it doesn't). Some tweaks I'll be suggesting you
in any case.
Section IV:
Dressing up.
//All the
apps mentioned are free, and available from Market, unless stated otherwise.
=. The ADW
Launcher CM comes with is very buggy on V9C. Install Launcher Pro
from the market and change its preferences accordingly. Its fast as hell.
=. CPU
Master Free: Must-have. Slide its minimum to 320 MHz and maximum to
the full - 864 MHz. Scaling ondemand. Select apply. You'll
feel the difference.
=. MoboPlayer:
for the AVI files. And even mp4. Its better than the built-in video player.
=. By now,
you must have realized that your screen is not rotating by itself or any other
method. All the menus and most of the apps open in portrait. Even the default
video player doesn't switches to landscape (mobo does, though). But landscape
is required, isn't it?
Download an
app called Orientation Control. Its the only one which can do
our job. Its paid in the market, though if you feel like, you can try
downloading it from here:
This helps
you to switch between portrait and landscape modes as and when you desire.
Makes the loss of the sensors much more bearable.
=. Quadrant
Standard: Most decent benchmarking app.
=. GPS
Essentials and GPS Test: both useful.
=. Titanium
Backup: Compulsory ingredient, if you plan to play with ROMs later
also. No one wants to download
applications
again and again, so this will save your day.
=. Hardware
Info.
=. Screen
Filter: Thanks arpan for the tip! Actually comes in handy.
=. Opera
Mobile: It is the best. No second thoughts about that.
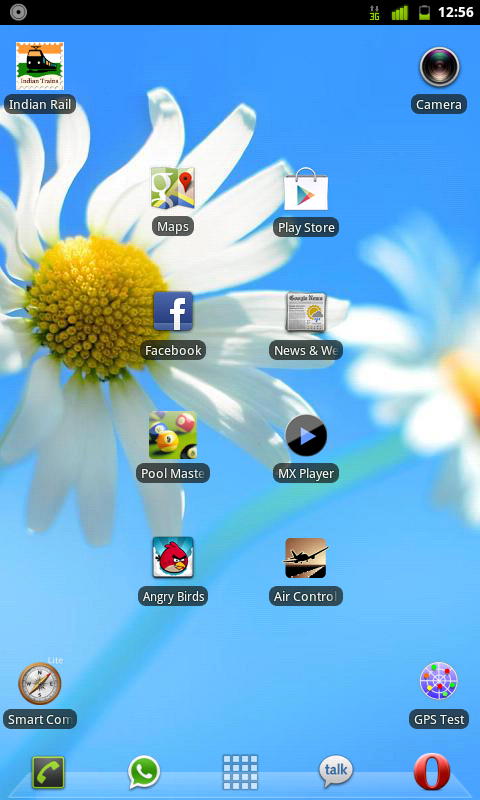
=.
Facebook, Facebook Messenger, Adobe Reader, aDownloader, fring, skype, Indian
Rail, Fancy Widgets, and our very own, Angry Birds!!
KaKawww!!! :->